examples and animations |
Birth Grid OperatorPath: Particle View > Add or select Birth Grid. PhysX simulation has a specific requirement for the initial placement of particles, namely that their shapes should not intersect each other. The standard Particle Flow position operators generate particle locations at random, disregarding the possibility whether particle shapes overlap. To address this requirement, the Birth Grid operator controls both the generation of the particles and their placement: two qualities that are tightly interconnected in the case of volume packing. The operator has a box-shaped 3D icon that determines where the particles are born. The particle positions are calculated relative to this icon. Thus, once the particle placement is calculated, you can transform the operator icon without the need for recalculation. To use Birth Grid, add it to an event or replace an existing birth operator in the particle system. When you add the Birth Grid operator, it creates a Birth Grid helper object at the world origin (0,0,0). Position this icon where you want the particles to be born. For best results, if the birth event contains a Position-type operator, delete it. See also Birth Stream Operator and Birth Group Operator. Important Birth Grid Points Birth Grid is the most complex birth-type operator available for Particle Flow, so it's important to be aware of how the various settings combine to create the particle array. As you work with Birth Grid, keep these considerations in mind:
Procedure For best results with Birth Grid, certain conditions should be met. For a recommended method, follow the following example procedure Note: The PhysX Flow included with Box#2 does much of this setup for you automatically, but even so we recommend following the procedure to help you understand basic usage of Birth Grid and Box#2.
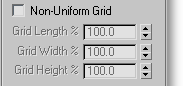
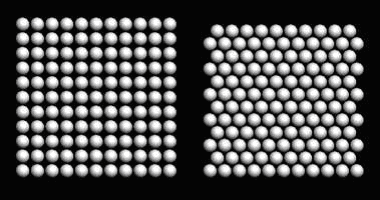
Interface Birth Grid positions the particles it creates within a 3D, box-shaped grid. By default, the particles are evenly spaced; the overall spacing is determined by the Grid Size setting. The higher this value, the greater the spacing between particles, and vice-versa. To produce uneven spacing, turn on Non-Uniform Grid and use its three numeric settings to adjust spacing on individual axes as percentages of the overall spacing. Both Grid Size and, optionally, the Grid Length/Width/Height % settings specify particle density within the grid. Conversely, the volume of the 3D grid is determined by the Icon Size settings (Length/Width/Height); these do not affect density. To achieve a grid shape other than a box, use Restrict By Mesh Volume with a mesh object. You can thus create a grid of any shape, filled or hollow (you can specify the shell thickness with the External Layers setting). By nesting objects in the Mesh Volume object, you can specify arbitrary layers of particles within the volume (for details, see Restrict By Mesh Volume, following). Emit Time - The frame number at which the operator emits all particles. Default=0. Birth Grid generates all particles simultaneously at the frame defined by the Emit Time setting. To make the particles appear gradually, generate the particles in a birth event without a shape operator, and then direct the particles in any fashion you like to another event containing a shape operator. Grid Base - Choose how to pack the particles on a single grid layer: in a square or triangular layout. The two choices are depicted as viewed from the top in the following illustration:
Grid Size - The distance between grid knots; each particle is born at a knot. When you use this parameter with Non-Uniform Grid off (see following), all knots are equidistant from one another. Non-Uniform Grid - When on, you can specify knot spacing separately for each of the three axes, expressed as a percentage of the basic spacing specified by Grid Size. Use the Grid Length/Width/Height % settings for this purpose. Alternating Lateral Offset - Places particles in more compact manner, similar to the way fruit is stacked at a produce stand. When on, makes Compact Vertical Size available.
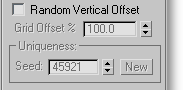
Random Vertical Offset - Randomizes particle placement by moving vertical columns of particles, only to the extent that particles do not interpenetrate.
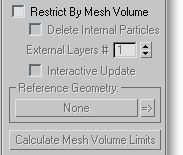
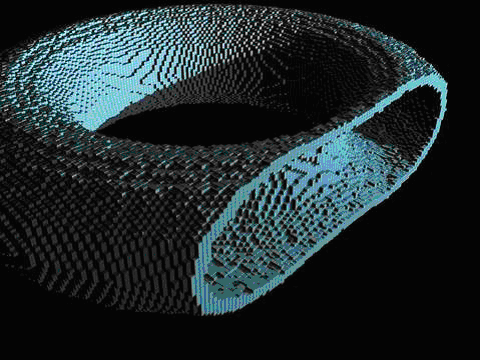
Restrict By Mesh Volume - When on, and you've specified the reference geometry (see following), Birth Grid generates particles only at grid-knot locations inside the reference object. This means, of course, that the reference object must be at least partially inside the operator icon. Tip: Use this feature to create a particle array with the shape of a mesh object. With the Delete Internal Particles option (see following), the particle array can take the form of a shell that defines the object shape, such as in the following illustration:
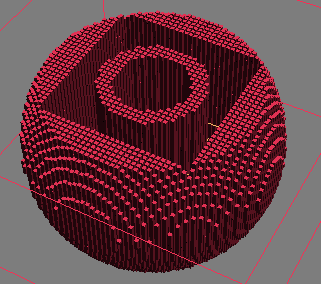
You can also use nested mesh objects, combined into a single object with Attach, for layered shells. The way this works is that, when using Restrict By Mesh Volume, the operator places particles only inside each pair of concentric surfaces, so you can get hollowed-out sections without using Delete Internal Particles. For the following illustration, we nested (from the inside out) two cylinders, a box, and a sphere. To get the open top and bottom, we reduced the Birth Grid icon height and positioned it so its top and bottom were inside the nested shapes' bounds.
Note: The process of determining which grid knots are inside of the reference geometry can be lengthy, depending on the number of grid knots and complexity of the mesh topology. During the calculations a running progress bar appears in the status area of 3ds Max interface (near the bottom). To interrupt the calculations, click the Cancel button. When Restrict By Mesh Volume is on, the following controls become available:
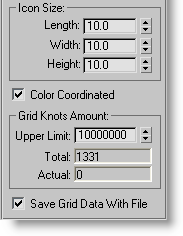
Icon Size - Set the size of the helper icon in world units. This affects the volume of the icon but not the density of particles. Keep in mind that, even when using the Restrict By Mesh Volume option, Birth Grid creates particles only inside the icon volume. For the most predictable results when using the density settings (Grid Size and Non-Uniform Grid), do not scale the icon directly; instead, use the Icon Size settings. Color Coordinated - When on, the Birth Grid icon is the same color as the Display operator in the event. Grid Knots Amount - Use the Upper Limit setting to specify the maximum number of grid knots for Birth Grid to use. Total - The number of grid knots in the operator's icon, without taking into consideration the restrictions imposed by a reference geometry mesh. Actual - When using Restrict By Mesh Volume with a reference geometry mesh, shows the number of particles after the mesh-volume restriction. Save Grid Data With File - Because it can take a long time to calculate the grid knots, you can save the result of the calculation with the MAX scene file by turning on Save Grid Data With File. Otherwise the grid knots placement is recalculated each time you open the scene file. The potential drawback is that this creates larger files.
|
|||||||||||||