Particle Splines by Anselm v. Seherr Seherr-Thoss aka PsychoSilence
This Tutorial treats handling with ParticleFlow and MaxScript.
The flight path put back by particles is represented with the help of a Scriptes as renderbarer Spline.
In addition we need 3D studio max starting from the version 5.1, the ParticleFlow Toolbox #1 and a MaxScript.
A demo version of the ParticleFlow Toolbox #1 can be downloaded here: http://www.orbaz.com/download/
I make the MaxScript available under this left: pfSpliner__AS.ms
(> a goal store right mouse button under...)
Note: The MaxScript is originally of Charley Carlat ( http://www.charleycarlat.com ) written and translated the notes of me extended and/or supplemented and into German.
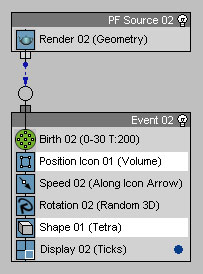
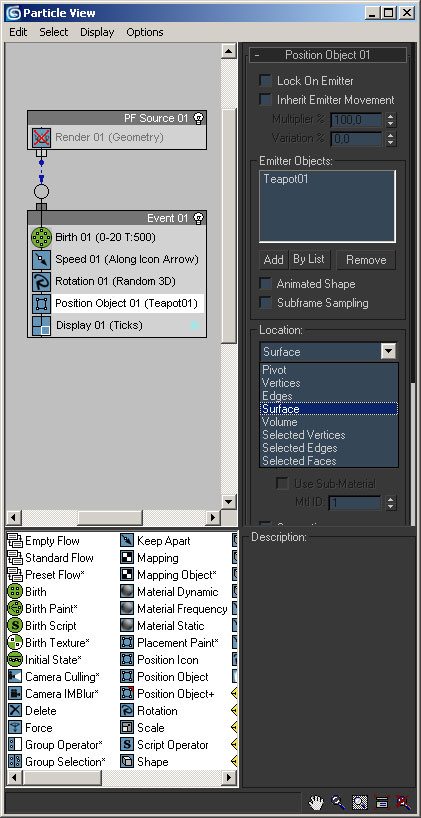
Now we draw "position a Object" in our Event and provide or import geometry of our choice. With emitter Objects we add this Geometrie(en) and set the location alternatively to Surface or volume.
Depending upon choice of the attitude particles are emitted from now at no more by the PF SOURCE, but by the surface of our Geometrie(en) or its volumes.
Resuming:
Alternatively Partikelemitation can
be steered also via a gray tone picture, in which one chopping with
Density by material. I have myself to use for such cases angewoehnt, a
Multi/Sub material, in its material plumb bob 1 the normal surface
material lie and in material plumb bob 2 an appropriate gray tone
picture. If one selected then Density by material, one indicates the
material plumb bob occupied by the gray tone picture for Mat ID simply.
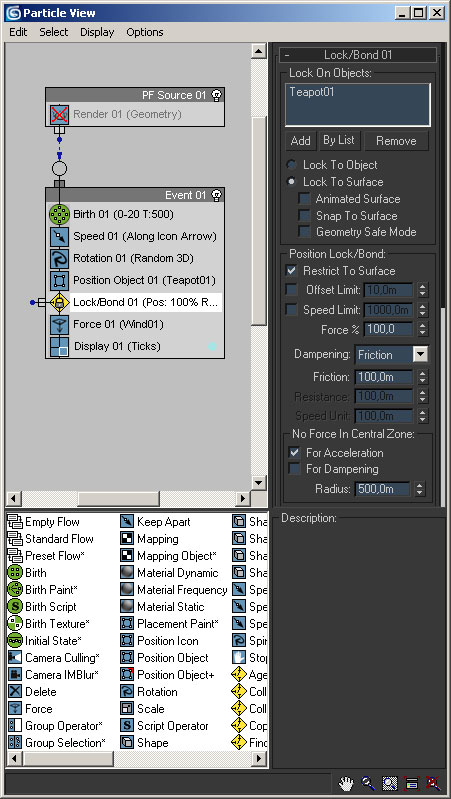
Next we pull to "a Event LOCK/BOND" in the Event 01 and add with LOCK on Objects our Geometrie(en). Then we set a chopping alternatively with LOCK ton of Surface and with Snap ton of Surface. With complex geometry it empfleit, after which one submitted these to a Optimize, the Geometry save mode heels too sat down.
With position LOCK/BOND we set a chopping with Restrict ton of Surface and the Dampening (absorption) on "Friction".
At
the point "NO Force in cent ral zone" should be selected For
Acceleration and a radius, which corresponds to that geometry, to which
we the Event bound.
"NO Force in cent ral zone" means, which
possible forces, which affect the flight path of the particles, are to
apply not to indicated the radius and/or the Beschlaeunigung or
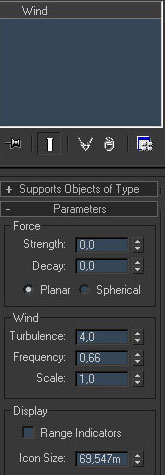
absorption, because we want to use for example a whirling of a wind, in
order to gegerieren interesting flight paths.
A LOCK/BOND operator arranges particles to remain sticking to a certain surface and to only solve these with certain influences again vons I.

< < my attitudes are here left shown.
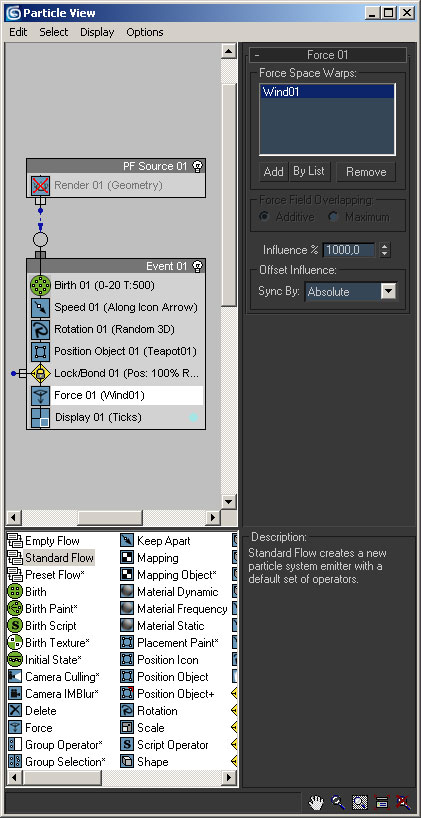
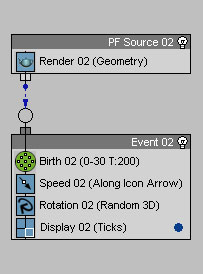
Now we have of course a wind, but if we move time eyelids, the space Warp has still no influence on our particle system. We must pull only a Force in our Event and add our space Warp.
Now our particle system is finished in principle. However should rumspielen you somewhat! e.g. with the LOCK/BOND operator tests different attitudes out, until the movement of the particles pleases you!

To this place I am received on some parts of the Scriptes to understand more exact.
The Script with the definition of the time and the touching distances of the Scripts is introduced:
pf = $
i2 = 1
pTest = false
endOfPFAnimation = 100 -- here end to the particle emission set
endFrame = 100 -- here end the Splineberechnung set
fIncrmnt = 2 -- here would be away the knot setting of the Splines set. I.e. in everyone wievielten Frame the position of a Patikels are determined
Here the Splines is produced:
for i in 1 ton numParts DO
(
newShp = splineShape() -- here one specifies, which kind shape is to be produced, in ours splineShapes falls, thus Splines...
addNewSpline newShp
newShp.name = ("ParticleSpline _ "+ i as stringer)
-- here any name for the Spliens can be assigned, in my case reads it
ParticleSpline_n (n = the through numbering) absolutely pays attention
to it, the name also still at others place in script to be entered must
(still at four further to place [ tuerkis marked ] exchange, best with Search&Replace)
)
Here the Knotenunkte of the Splines is determined and set on the basis the position of a particle at a certain time:
for t in 0 tons (endFrame/fIncrmnt) of DO
(
sliderTime = (t * fIncrmnt)
-- here one specifies, how many knots are inserted (SliderTime = the
time-carried out, fIncrment = the interval), in our case of 50
junctions (100Frames animation and in each second Frame a knot...)
for i in 1 ton numParts DO
(
pf.particleIndex = i
pId = pf.particleID
if pId! = 0 then
(
ParticleSplineShp = execute ("_ "+ pId as stringer)
addKnot ParticleSpline Shp 1 # smooth # LINE pf.particlePosition
) -- end to If
)
) -- end to For
SELECT $ ' ParticleSpline _ * ' -- here the Splines will become all together selected, thus equal a Shader assigned can or something similar
updateShape $
After we analyzed now the Script in parts, we want to also see, what can do it.
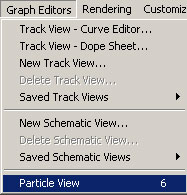
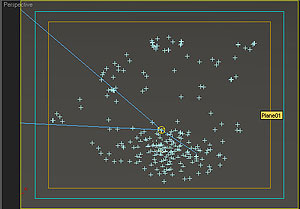
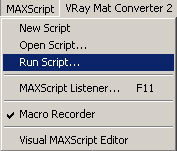
Is important, which implements it the Script with more selected "PF SOURCE"!
The PF selects SOURCE. Now we go out into the menu border under the point MaxScript and to click on "run Script..." and to select then our Script. (it stores best equivalent, where it belongs, naemlcih in scripts verzeichnins in the root of your max file).
Now the time eyelids the animation in indicated in the Script the interval should go through the animation and leave then oh Splines as traces.
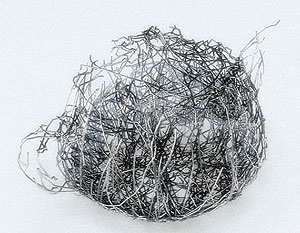
< < is here the result of my version.
TAP: Let the Script only with few particles go through, and set the developed Splines then on "Enable in Renderer" and "Enable in Viewport". otherwise see to her only lines, which the Renderer cannot interpret. Also should specify a thickness to it.
After the Splines got a thickness missed and in the Viewport is visible, all Splines deletes again and lets script again with more Parikeln durchlafen. The Splines developed now has the same Settings, as the few before.
Now still another schickes material draufgepackt and then is called it Happy Rendering their Renderfarmer!
Here to good lastly my basis scene: Pflow spline.max