Included with Box#2 is ParticleSkinner, a powerful modifier that lets particles function as "bones" inside a mesh "skin." As you'll see in this brief introduction, this allows for some quick and easy but exciting possibilities for special effects.
For this lesson, you'll go back to the particles that break up as columns.
-
Open included sample scene, Box2_tutorial1.max.
-
Open Particle View and set Bind Distance to a low enough value that only vertical bindings appear. A value of 10.0 should work.
-
Play the animation and make sure the particles break up into columns.
The problem is that, as there's only one ball, only the center columns are affected by its impact. One way to resolve this is to have more particles.
-
Click the Birth Stream operator, and in the Stream Source Icon group, increase the width value so that the icon is the same width as the wall; about 125 units.
-
Also in Birth Stream set Emit Stop to 1.
Now Total=3, but if you play the animation, the balls are too close together, and still don't affect all the columns. You can adjust their placement with the Uniqueness Seed value.
-
Set Seed to 21150 and play the animation.
Not all of the columns are hit, but enough are that they all end up in different positions.
-
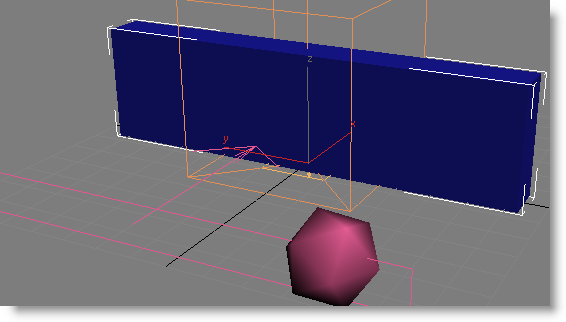
Create a Box primitive that fits snugly around the brick wall. Set Length Segs and Height Segs both to 20, and Width Segs to 5.
In the included sample scene, Box2_tutorial1a.max, the size is 127 x 12 x 34, but this might vary in your scene.
-
Apply the Particle Skinner modifier to the box.
-
On the modifier Parameters rollout, under Particle Flow Systems, click the Add button and then click the box in the viewport. (You're actually selecting one of the particles inside the box.)
The Particle Flow Systems list now contains a single entry: PF Source 01. However, not all the particles in this system should affect the box "skin"; just the ones in Event 01.
-
Turn off All Particle Flow Events in the Particle Flow Systems group, and then click Add By List and select Event 01.
Particle Skinner works by letting particle motion exert an influence on nearby mesh points.
Ideally, all mesh points in the modified object should be influenced by particles; otherwise, they get left behind when the particles move, causing unsightly stretching of the mesh.
Thus, a useful option is the ability to check for uninfluenced mesh points, which helps you to set the influence distance to the right amount.
-
Expand the Particle Skinner modifier stack entry so you can see the Control Particles sub-object level, and then click Control Particles to highlight it.
-
Turn on Activate Skinning at the top of the Parameters rollout, and then scroll down to the Display Parameters rollout, expand it, and turn on Display Unassigned Points.
-
Back on the Parameters rollout, in the Distance Influence group, note that the Absolute option is active. Use the spinner to lower the Absolute value until you see small red squares on the box, as depicted in the following illustration (these indicate mesh points that aren't influenced by any particles), and then increase it until you don't see any more from any angle. A value of 7 should be about right.
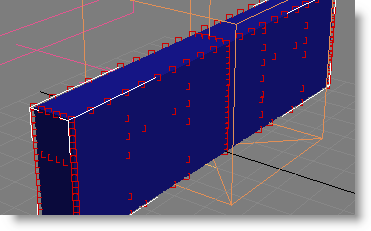
Tip: You can see the number of unassigned points on the Activate Skinning Info dialog, which you open by clicking the ? button next to the Activate Skinning button.
-
Also, in the Rip Apart group, just below the Distance Influence group, set Type to Distance Change.
Now that the basic setup is finished, you don't need to see the "brick" particles anymore.
-
Click the Display operator in Event 01 and set Type to None.
-
Play the animation.
As the ball particles strike the now-invisible particles, they break up and take the skinned-box mesh with them, ripping it apart based on the distances traveled by the particles. However, the ripping isn't perfect; a few of the mesh faces just stretch out, spoiling the effect somewhat.
The remedy is simple: Just make the ripping more sensitive to the change in distance between particles.
-
The Distance Change > Relative% setting is currently 50.0; the default. Change this to 1.0.
That way a relatively small change in distance causes the mesh to rip.
-
Play the animation.
This time the pieces break cleanly, with nicely jagged edges for realism.
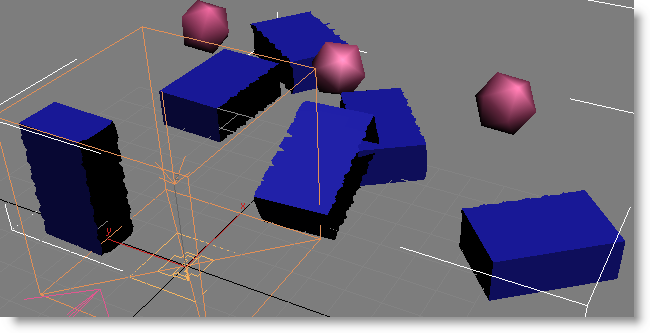
If you prefer a straighter edge, try reducing the Edge Split Precision% value.
You might notice that the pieces don't seem very solid, as you can see through the inside surfaces. This can be remedied with a standard 3ds Max modifier.
-
Apply a Shell modifier to the box, above the Particle Skinner modifier, and set the Inner Amount to 2.0 and the Outer Amount to 1.0.
Now when you play the animation, the pieces look more realistic.
Tip: If you want to render the animation, first set the Render 01 operator in the PF Source 01 event to Type=Phantom, so the particles don't render.
This tutorial, as long as it was, gave you but a tiny taste of the many capabilities of Box#2 in conjunction with the existing features of Particle Flow and 3ds Max. We recommend that you experiment with the scenes you've created, changing parameters, using different types and quantities of particles, and so on. Also, visit the Orbaz forums (www.orbaz.com/forum) and participate in discussions there.